Entrepreneurs AnalyticsIntegrate all your Analytics and Ad-Tracking with Google Tag Manager

Frederik Vosberg
Most entrepreneurs I talk to endorse that following the build, measure, learn cycle is a good idea. So a fundamental part is measuring to learn from the data. Do you want to answer questions like how many customers are visiting my landing page? Where do they come from? How many of them convert? How many of them even scroll down to the Call to Action? You can and should leverage multiple analytics solutions for that. E.g. you could augment Google Analytics with Hotjar, to get more qualitative insights about how customers behave on your website. To easily install and configure these solutions you can use Google Tag Manager. It even helps you define custom events you want to track without coding. So let's dive into it.
To kick things of I'll walk you through the setup of Google Tag Manager (GTM) itself. Next we‘ll create a Google Analytics 4 property. A property represents A place, where you want to collect data. Then I‘ll show you how to integrate it in your website via GTM. The last step will be testing of the GA4 configuration and deployment to production. You‘ll end up with basic tracking of page views, link clicks and scrolls (scrolled down to the 90% mark of a page) and have the basis for installing other marketing tags or track custom events.
Consent mode is also a pretty cool new feature, but covering that in this post would be too elaborate. I'll save it for the next post, so make sure you're subscribed!
Disclaimer: In this article, I'll only talk about Google Analytics 4. This is the new version of Google Analytics, launched in late 2020. The difference between Google Analytics 4 and the old Google Analytics Universal is covered on this page.
Another Disclaimer: I can't provide you with any legal advice. You are responsible for your implementation and for being legally compliant. Consult your data security officer and lawyer for a final check.
What is Google Tag Manager?
Why should I bother, to set up Google Analytics via Google Tag Manager? And what is Google Tag Manager anyway? This is easy to answer:
- Manage the integrations of different analytics and marketing solutions (aka Marketing Tags)
- Track custom events like form Submissions or that users viewed an element on the website
- Leverage the new consent mode to get more insights in the future, while being GDPR compliant.
Google Tag Manager is a tool to set up marketing tags on your website without the need of writing code. So you might ask yourself: What the heck is a marketing tag? At least I did the first couple of times. It is a code snippet (with the name tag like in HTML tag) to set up marketing tools on your website. This can be classic analytics solutions like Google Analytics, more qualitative analytics solutions like Hotjar for Heatmaps or advertisement platforms like Google Adwords.
You have to integrate the Google Tag Manager on every webpage of your site or page in a mobile app. This enables you to manage at what point different marketing tags should be triggered on your website - without leaving GTM.
How to set up Google Tag Manager
This part consists of three steps: Createing an account in GTM, integrating it in your website and testing your setup. I describe the first two steps very briefly. The Tagm Manager UI guides you through the creation of the account. The technical integration highly depends on the technologies used to built your website.
Create an GTM account
- Go to tagmanager.google.com
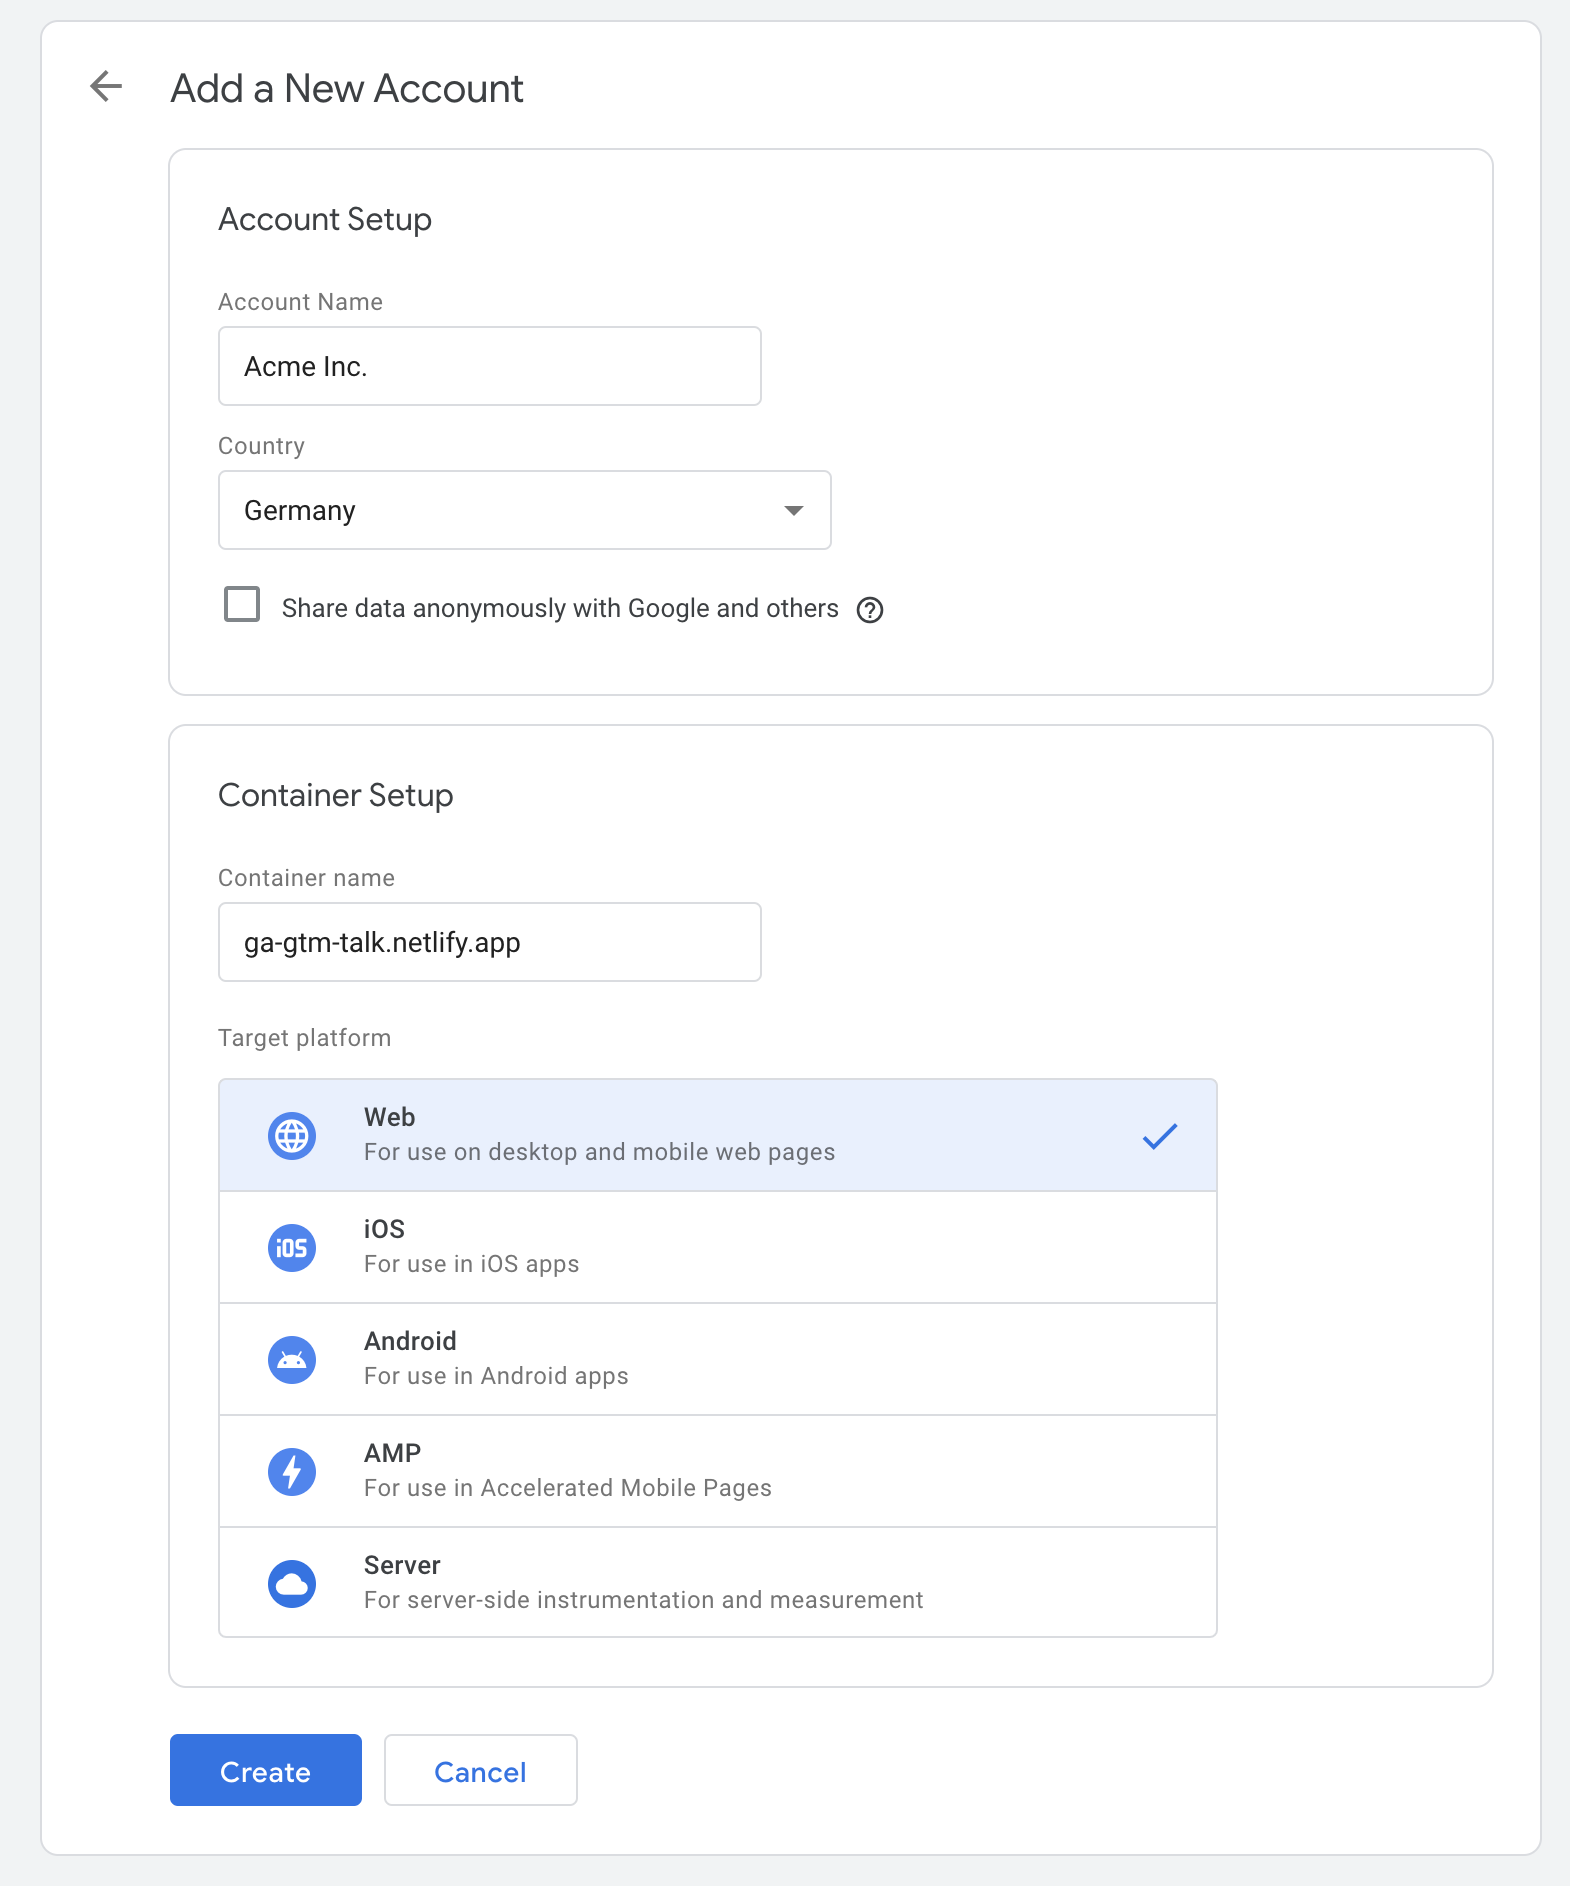
- Create an Account with:
- A descriptive account Name like: Acme Inc.
- Your country configured
- And the configuration for your first GTM container
- The URL of your website like ga-gtm-talk.netlify.app
- The target platform, where you want to use this container
Technical Integration
Install the GTM container on you website. (https://developers.google.com/tag-platform/tag-manager/web). This step depends on the technical implementation of your website. You might want to talk to your developer.
import Document, { Html, Head, Main, NextScript } from 'next/document'

const GOOGLE_TAG_MANAGER_ID = process.env.GOOGLE_TAG_MANAGER_ID;

export default class MyDocument extends Document {
  render() {
    return (
      <Html>
        <Head>
          <script dangerouslySetInnerHTML={{
            __html: `
              (function(w,d,s,l,i){w[l]=w[l]||[];w[l].push({'gtm.start':
              new Date().getTime(),event:'gtm.js'});var f=d.getElementsByTagName(s)[0],
              j=d.createElement(s),dl=l!='dataLayer'?'&l='+l:'';j.async=true;j.src=
              'https://www.googletagmanager.com/gtm.js?id='+i+dl;f.parentNode.insertBefore(j,f);
              })(window,document,'script','dataLayer','${GOOGLE_TAG_MANAGER_ID}');
            `
          }}/>
          <link rel="stylesheet"
            href="https://use.fontawesome.com/releases/v5.11.2/css/all.css" />
        </Head>
        <body className="antialiased bg-body text-body font-body">
          {/* Google Tag Manager (noscript) */}
          <noscript><iframe src="https://www.googletagmanager.com/ns.html?id=${GOOGLE_TAG_MANAGER_ID}"
          height="0" width="0" style={{display: 'none', visibility: 'hidden'}}></iframe></noscript>
          {/* End Google Tag Manager (noscript) */}
          <Main />
          <NextScript />
        </body>
      </Html>
    )
  }
}
Test your setup
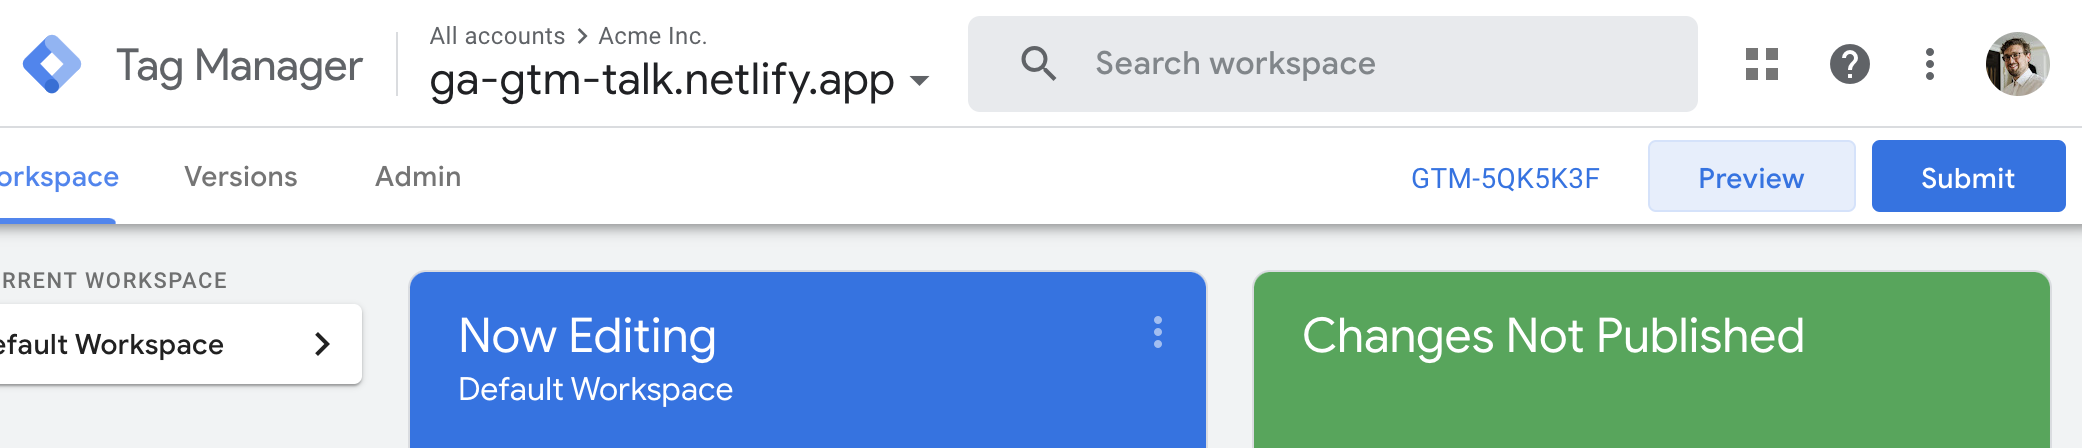
After deploying the code changes, you are ready to test your Google Tag Manger Setup. There is a Preview button in the upper right corner. Click it and the Tag Assistant opens for the current version of the Workspace.
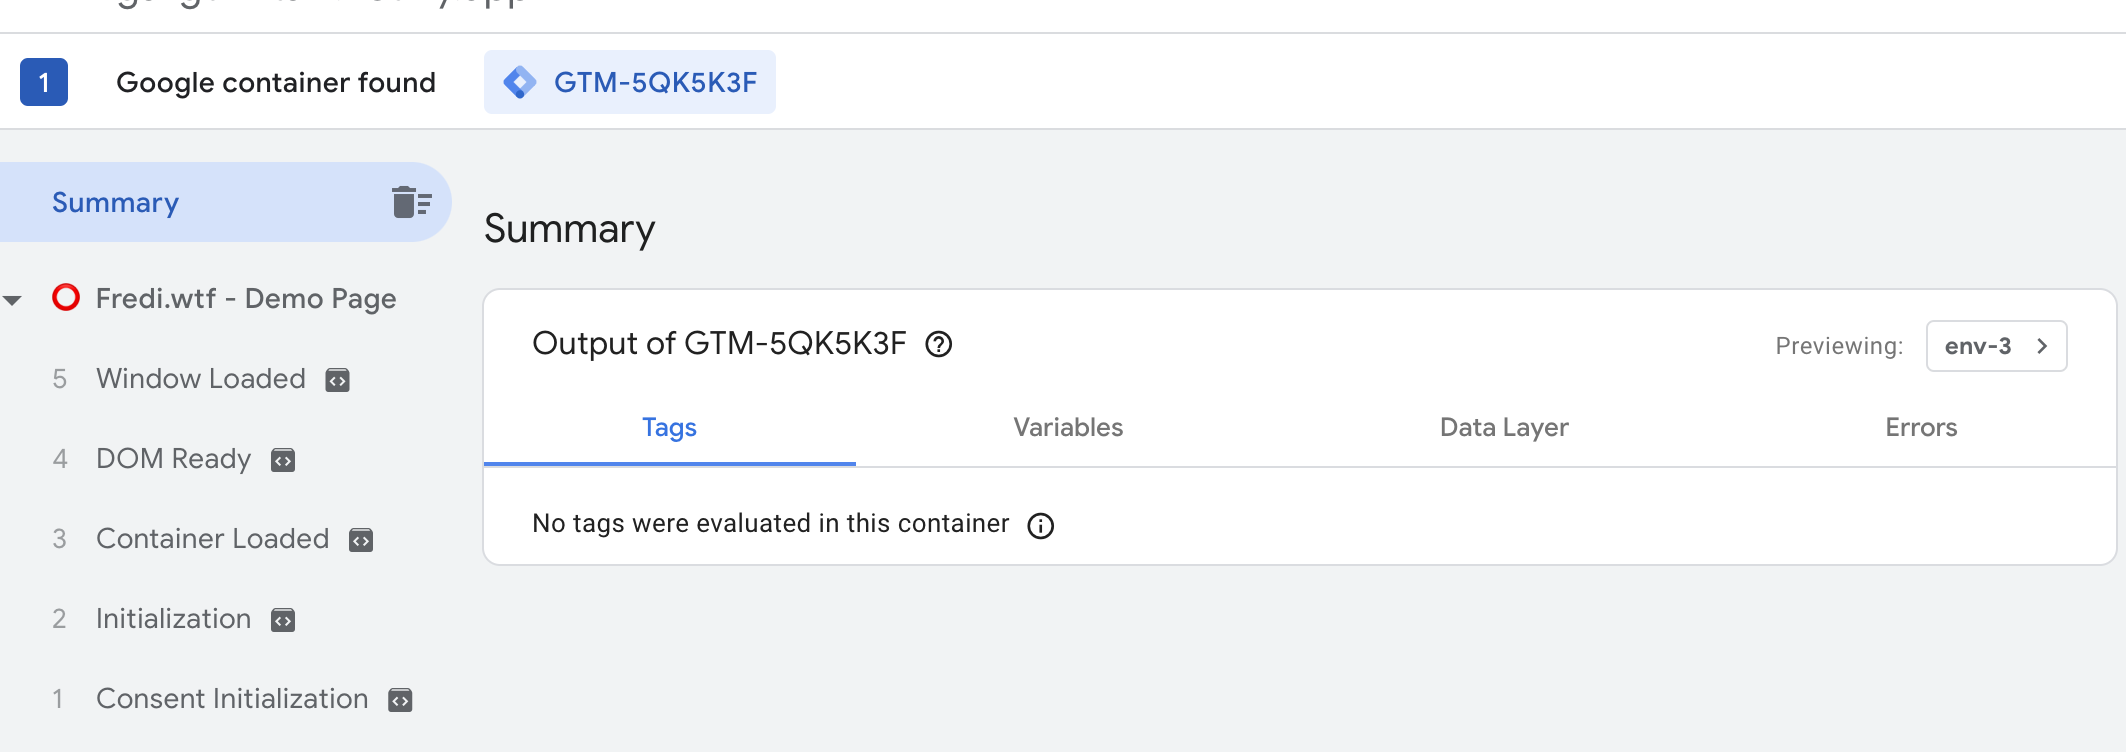
After entering the URL of your web page, you'll see the tag assistant. It shows in the header that one GTM Container was found. In the body of the page it says that no tags have been evaluated, because, we didn't configure any.
Setting up Google Analytics with GTM
For the setup of your analytics, you have to create a GA4 property. With the measurement ID of that property you can configure the GA4 configuration tag in GTM.
Start with creating a new Google Analytics account, if you don't have one. Follow the wizard, in which you'll have to provide some personal information and confirm your email address and phone number.
To create a new property in Google Analytics, you have to open the admin section by clicking on the gear icon in the bottom left corner.
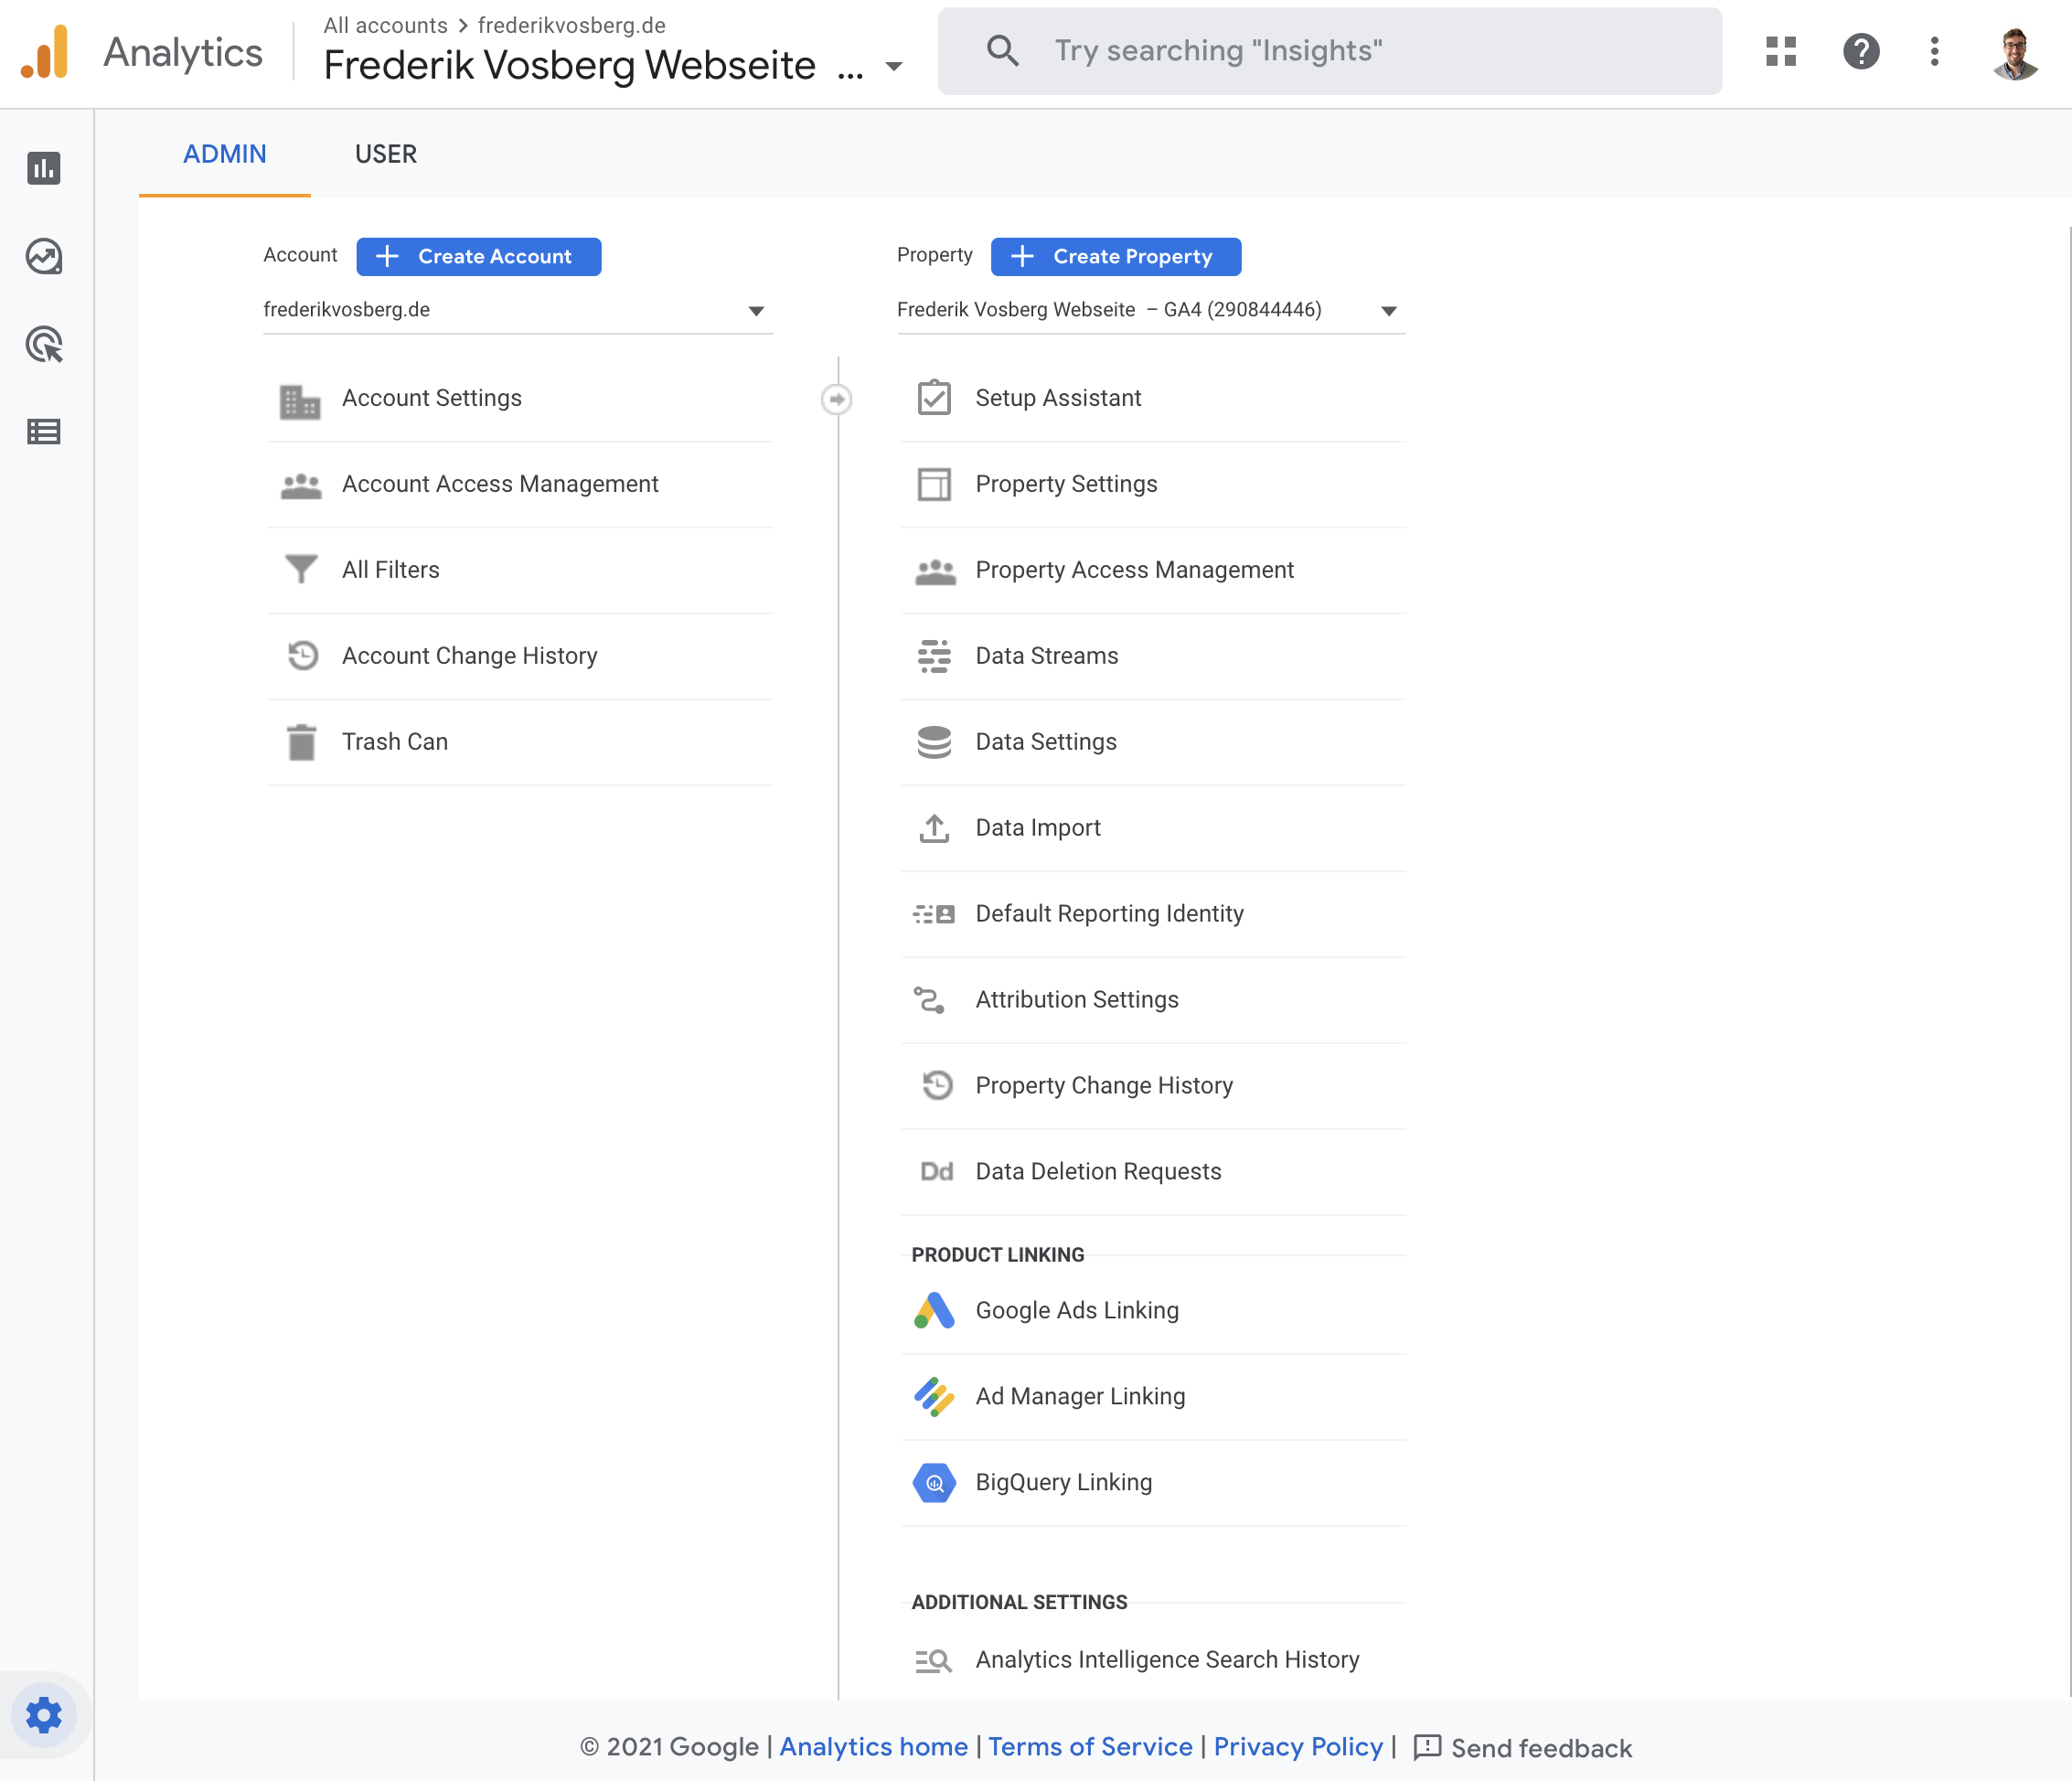

Then click the create Property button and follow the wizard. After successfully creating the property, you need to create the data stream, which is used by GA to collect the events. For your website choose "Web", enter the URL and give the stream a name. Let enhanced measurements selected, to have some basic insights already set up for you. On the next screen the Measurement ID is displayed in the upper right corner.
Now you can configure Google Tag Manager to deploy Google Analytics to your website. Go to https://tagmanager.google.com/. We want to create a new tag, so click on Tags and hit the New button. A Tag consists of two sections.
The tag itself, where you configure what data is collected and to which platform it is sent. In the second section, you can configure, when this tag is going to be triggered. You want the basic analytics tags on your website to be triggered on every page. More specific tags might need something like a trigger on an outbound link click.
Click on tag configuration and choose the Google Analytics: GA4 Configuration Tag. This tag configures your website for Google Analytics tracking. The basic setup includes tracking of basic events like page views. The property setting enhanced measurements adds other good insights like link clicks to it. Now enter the Measurement ID of the GA4 Data stream into the appropriate field.
Next click on the triggering section and choose the pre defined trigger "All Pages". After naming this tag in the first line you can hit save. The tag you've created is now a draft in your workspace. Next, I'll show you how to test and deploy it.
Test your Setup with the Tagassistant
As described in the first section, Google Tag Manager enables you to test your newly configured tags without deploying them to your production website. To do that, click the Preview button in the upper right corner of the GTM UI. This opens the Tag Assistant for the current version of your workspace and asks you which URL of your website you want to view to test your tags. Hitting Connect leads you to a screen where you can see what Google Tag Manager did on your website. This refreshes when you interact with your website in the opened window.
On the left you see the messages that have been sent. A message is new data in the GTM data layer. You can think of it as the way developers can interact with GTM. If you click on a message, you can see the state of GTM after evaluating this message. You can see which Tags were fired, the value of the different variables, the state of the data layer and errors that occured while evaluating the tags.
Opening your website via the tag assistant sets your Google Analytics containers into debug_mode. That means, that you can see the events in the DebugView in Google Analytics as well.
Deploy it
After we've ensured, that everything is fine with our changes we can finally deploy them to our live production page. You do that by hitting the send button in Google Tag Manager in the upper right corner of your workspace. You can give the new Version a name and description and review the changes you are about to deploy. After hitting send you are done and your changes are in production.
Summary
In this article, you've set up Google Tag Manager and Google Analytics 4. Now you know how to leverage Google Tag Manager to integrate marketing tags. A plus is that your Google Analytics collects data for valuable insights already. Your setup isn't GDPR compliant though. You are not asking for consent before you start tracking your customers with the help of cookies. Another key feature you don't use is the ability to create custom events and custom triggers. You can use them to collect more data without the need to code.
The consent mode and setup of custom events with custom triggers will be part of future articles in my blog. If you don't want to miss them, feel free to subscribe to my mailing list.